Meet your Chase Countertop Terminal
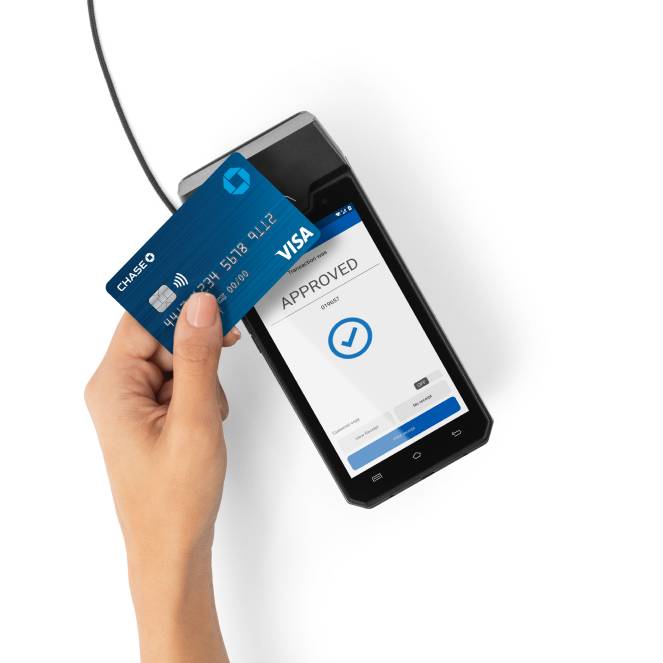
The Chase Countertop Terminal is a modern, wired device designed to sell on your store countertop with confidence. Equipped with a large color touchscreen and customizable options, it accepts tap, chip & PIN, swipe, manual key entry and digital wallets for ease of use. Enjoy uninterrupted, Ethernet-powered connectivity with enhanced processing power for a fast and reliable service.
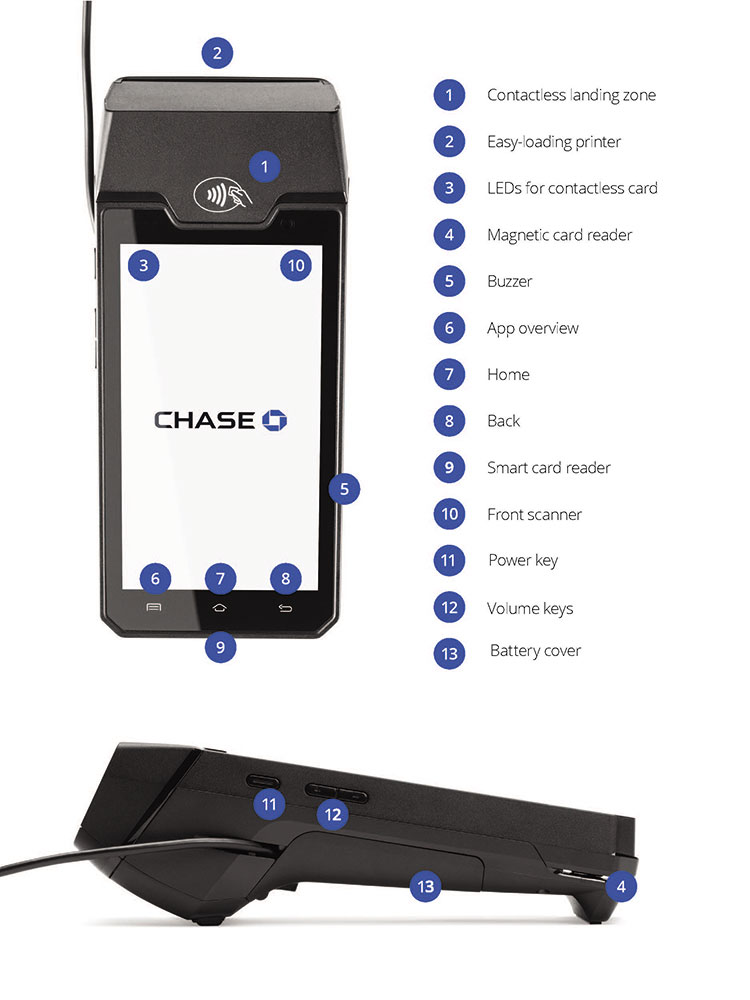
Navigating your Chase Countertop Terminal
Check out the helpful diagram below to get familiar with your Chase Countertop Terminal.
Unboxing your Chase Countertop Terminal
You just received your terminal. Now what?
1
Connect your magic box
Easily connect your Chase Countertop Terminal with your Magic Box first.
Connect your Magic Box to your Ethernet connection to complete.
Follow the steps in Getting started for more information.
2
Set up your password
Set up your credentials for security purposes. You will need these credentials to process refunds.
Refer to Tips, taxes and passwords for detailed steps on setting up your manager credentials.
3
Customize your device
You are now ready to customize your device with preset tips or taxes to make the checkout process smoother.
Follow the steps under Tips, taxes and passwords to complete.
You are now ready to start processing.
Chase Countertop Terminal FAQ
Explore frequently asked questions to learn how to get the most out of your Chase Countertop Terminal.
Please connect with our Sales team.
The Chase Countertop Terminal can accept tap, chip & PIN, swipe, manual key entry or digital wallets such as Google Pay™ and Apple Pay®.
- Open the back cover by releasing the latch
- Take the Magic Box with attached cable and insert the USB type-C connector into the corresponding slot
- Secure the cable by sliding it into the notch and place the cover back on
Here’s a visual reference:
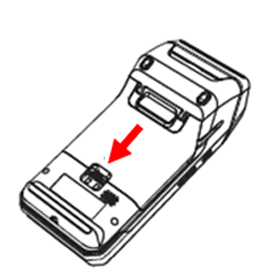
1. Open back cover
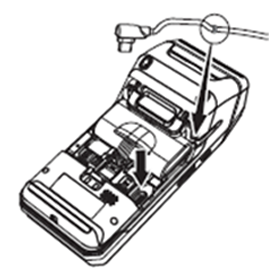
2. Insert USB-C
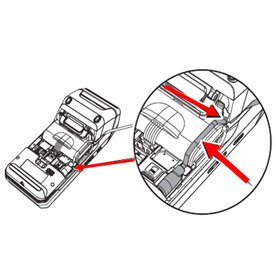
3. Secure cable
- Connect the charging cable to the charging block and connect the other end to the Magic Box
- Take the USB-type a connector, insert it into the charging block and insert the USB-C end into the Magic Box power port
- Connect the Ethernet cable to the Magic Box
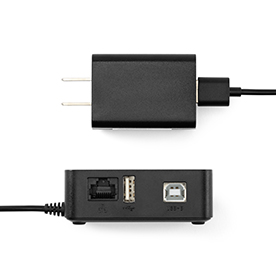
Connecting charging block and cable
To power on:
Press and hold the power key for about 1 second until the Chase screen appears
To power off:
Press and hold the power key for more than 2 seconds until the menu appears, then choose Power off
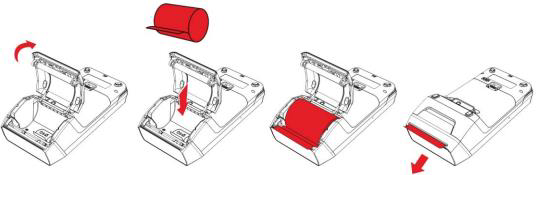
- Turn the device over and lift the latch located at the top of the terminal, pulling it to the rear of the terminal
- Pull the paper up to the top of the terminal while holding the paper and close the cover
- Make sure to press both upper corners of the paper flap to ensure it snaps into place
Here’s a visual reference:
You have the option to display the terminal’s text in English or French.
- Tap the three lines ☰ at the top left of your screen
- Choose UI Language twice
- Choose English or French and tap Confirm
Note: The language on merchant and customer receipt copies language will also be changed.
- Tap the three lines ☰ at the top left of your screen
- Swipe up and tap Exit to return to the Home Screen
- You will see a screen with the date displayed, Swipe left to view all the applications
- Choose the Settings gear icon
- Enter 350000 and tap OK
- Swipe up and choose System
- Choose Date & Time
- Choose Date, then adjust it using the calendar and tap OK
- Choose Time, then set the hour and minutes using the digital clock and tap OK
After a set period of inactivity the terminal screen will timeout in order to help conserve battery life and go into power-saver mode. Follow the steps below to adjust how long the terminal takes:
- Tap the three lines ☰ at the top left of your screen
- In the menu, swipe up and choose Settings
- Enter your Username and Password, then tap Confirm
- Choose the System tab
- Swipe up and find Power save timeout
- Adjust the timeout and enter the value in seconds (e.g. 180 seconds for 3 minutes) and tap Confirm
Note: To adjust the generic screen timeout simply choose Generic screens timeout, adjust in seconds and press Confirm.
- Tap the three lines ☰ at the top left of your screen
- Swipe up and choose Exit to return to the Home Screen
- Choose the Settings gear icon
- Enter 350000 and tap OK
- Choose Display
- Tap Brightness level and adjust it by swiping left or right
- Tap the three lines ☰ at the top left of your screen
- Under the MENU tab, find Dark Mode and toggle it ON or OFF based on your preference
Chase Assist is the on-device support application for guides, troubleshooting help and additional error codes that may appear on your terminal. You can access this application for 24/7 assistance.